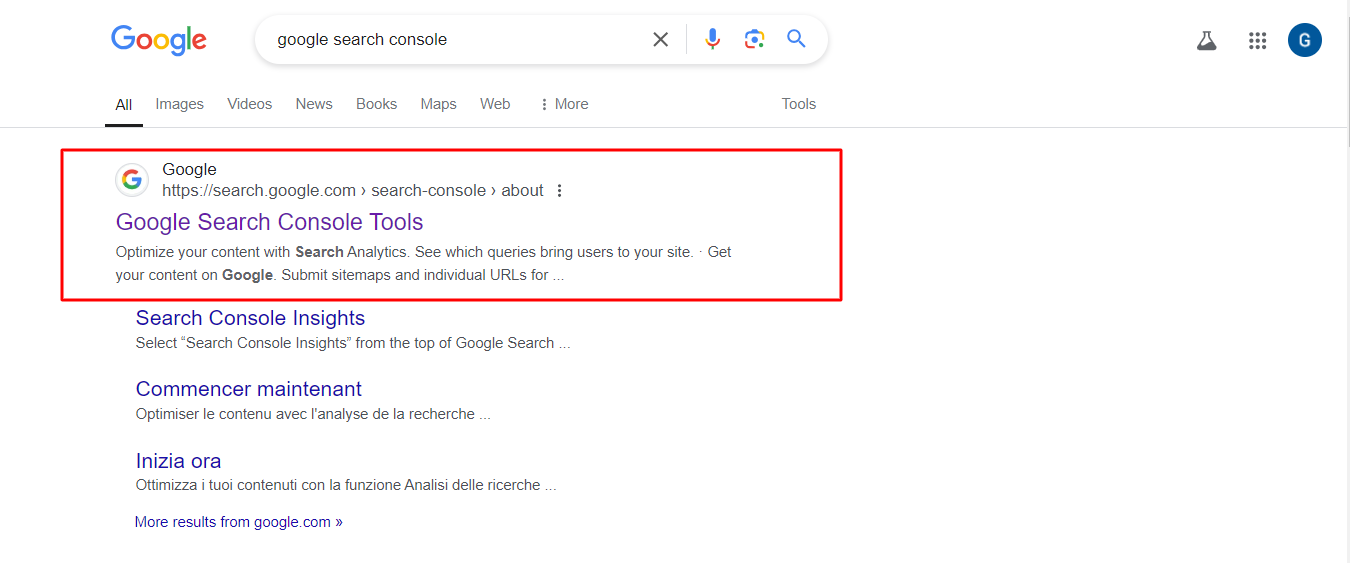
So, you’ve got yourself a shiny new website. Congrats! Now, the next step is to make sure people can actually find it. You wouldn’t throw a big party and forget to send out the invites, right? Well, that’s exactly what happens when your website isn’t on Google Search Console.
If you’re sitting there wondering, “Google Search what now?”—don’t worry. I’ve got your back. I’ll walk you through the whole process like we’re just chatting over a cup of coffee. And by the end of this, your website will be snugly tucked into Google’s radar, ready for the world to discover.
What Is Google Search Console and Why Should You Care?
In simple terms, Google Search Console (GSC) is a free tool that helps you monitor your website’s presence in Google search results. It tells you how Google sees your site, lets you know if there are any issues, and even shows you which search terms (keywords) people are using to find your pages.
Think of it like this: GSC is your website’s personal fitness tracker, showing you the health stats that really matter. And trust me, if you’re serious about growing your website’s traffic, this is a tool you’ll want in your corner.
Step 1: Sign Up for Google Search Console
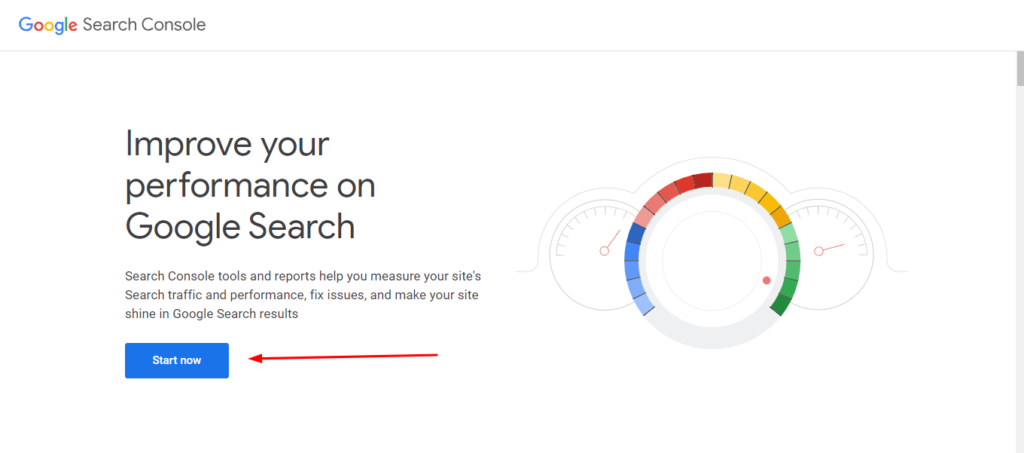
Let’s start at the beginning. If you don’t already have a Google account, now’s the time to create one. (But seriously, who doesn’t have a Google account in 2024?) Once that’s set up, head over to the Google Search Console homepage and hit that big “Start Now” button.
See? We’re already cruising.
Step 2: Add Your Website
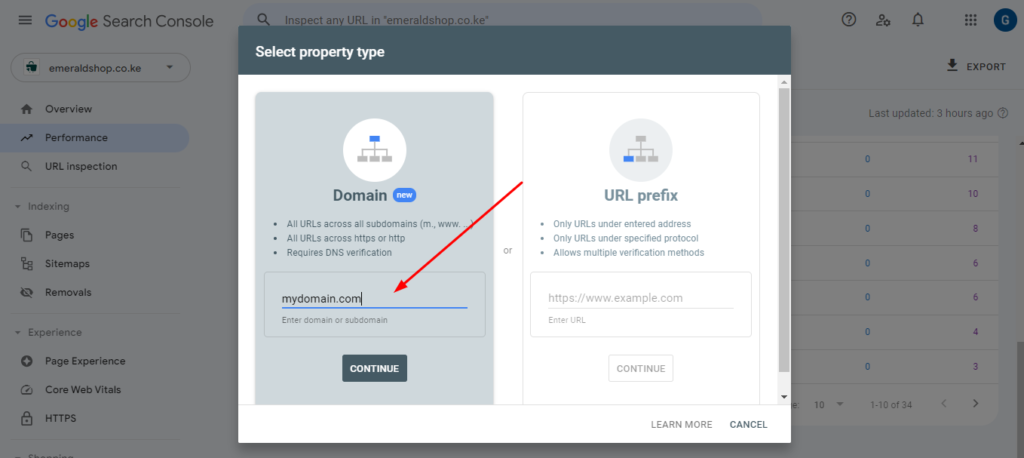
Once you’re logged in, you’ll see two options: “Domain” and “URL Prefix.” Now, here’s where it gets a bit technical—but don’t sweat it, I’ll explain.
- Domain: This option covers your entire domain, including subdomains (like blog.yourwebsite.com).
- URL Prefix: This one’s more specific, only tracking the exact URL you provide.
For most people, the Domain option is the way to go. It gives you a complete picture of your entire site. Just enter your domain (without the “www” or “https://”) and hit Continue.
Step 3: Verify Your Website
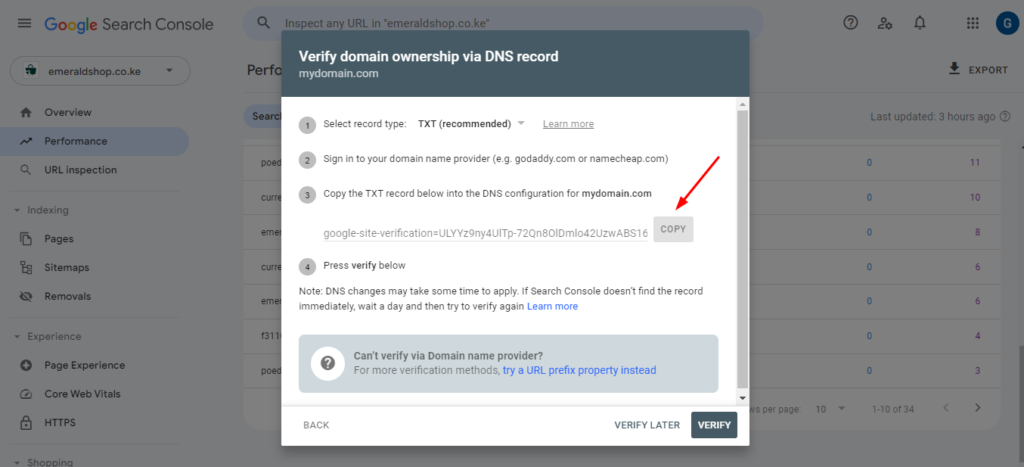
Now comes the “proving you own this thing” part. Google needs to confirm that the website is actually yours (because let’s face it, anyone could claim they own “awesomewebsite.com” if verification didn’t exist).
There are several ways to verify your website, but the easiest one, in my experience, is using the DNS verification method. It might sound intimidating, but bear with me.
- DNS Verification Method: You’ll be given a TXT record that you need to add to your domain’s DNS settings. This is a fancy way of saying you’ll need to log into wherever your domain is registered (GoDaddy, Namecheap, etc.), find the DNS settings, and paste that code in there.
- HTML File Upload: If the DNS thing feels too techy for you, no worries. You can also download an HTML file from GSC, then upload it to your website’s root directory. This option works best if you’ve got access to your site’s back-end or you’re using a CMS like WordPress.
- Google Analytics: If you’re already using Google Analytics, you can verify your site with one click. This is another great option if you’re not feeling tech-savvy today.
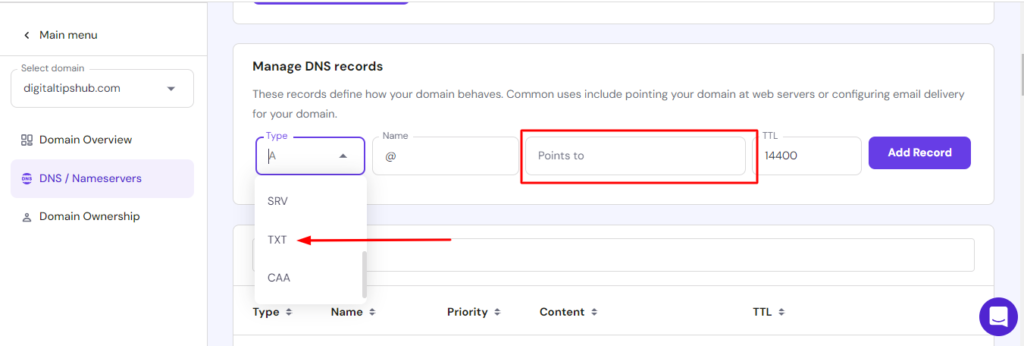
To verify domain ownership in Google Search Console via DNS in Hostinger, follow these steps:
- Copy the provided TXT record for verification.
- Log in to your Hostinger account and navigate to DNS Zone Editor.
- In the DNS settings, add a new TXT record with the code provided by Google.
- Once you’ve completed the verification steps, hit Verify on GSC, and boom—you’re in!
Google will confirm the verification, which may take a few minutes.
Step 4: Submit Your Sitemap
This step is the equivalent of handing Google a map to all the hidden gems on your site. It’s not strictly necessary, but submitting a sitemap helps Google crawl your website more efficiently. Think of it like leaving breadcrumbs for Google’s bots so they don’t get lost in the maze of your web pages.

Here’s how you do it:
- In GSC, go to the Sitemaps section in the sidebar.
- Paste the URL of your sitemap (usually something like mydomain.com/sitemap.xml).
- Click Submit.
If you’re using WordPress, plugins like Yoast SEO automatically generate a sitemap for you. How easy is that?
Step 5: Monitor and Make Improvements
Congratulations! Your website is now on Google Search Console. But the fun doesn’t stop there. Now that you’re in the club, it’s time to start tracking how your site is doing and making improvements.
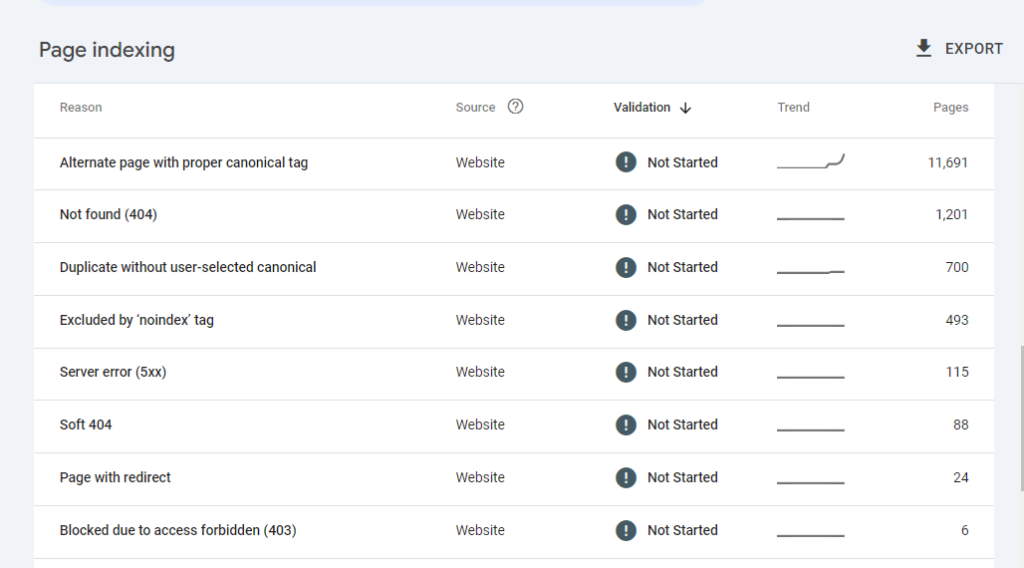
Here’s what to keep an eye on:
- Performance Report: This shows you how well your site is performing in search results. You’ll see how many clicks you’re getting, your average position, and which keywords are driving traffic.
- Coverage Report: If there are any errors preventing Google from crawling your pages (like broken links or server issues), they’ll show up here. Fixing these issues is super important if you want to keep your site ranking well.
- Mobile Usability: With more people browsing on their phones these days, you want to make sure your site looks and works well on mobile. GSC lets you know if there are any mobile-specific problems like small text or buttons that are too close together.
Final Thoughts
Adding your website to Google Search Console is one of those steps that every website owner should take, but not enough people do. Trust me, the insights you’ll gain are worth it, and it’s a fantastic tool for improving your site’s visibility in search results.
If you’re feeling a bit overwhelmed by the techy stuff, don’t sweat it! Like anything new, it takes a bit of practice. But once you get the hang of it, you’ll be wondering why you didn’t sign up sooner.
So, what are you waiting for? Go ahead, get your website on Google Search Console, and start making the most of those powerful insights. And hey, if you ever get stuck, just remember: even the best of us had to Google “how to add my website to Google Search Console” at some point!
Quick Recap (Because We All Love a Checklist)
- Step 1: Sign up for Google Search Console.
- Step 2: Add your website (choose Domain or URL Prefix).
- Step 3: Verify your website (DNS method, HTML upload, or Google Analytics).
- Step 4: Submit your sitemap (optional, but recommended).
- Step 5: Track performance and fix any issues.
There you have it! Now go forth and conquer the world of SEO!

