Hey there! Let’s chat about something that might sound techy but is crucial if you’re running Facebook ads and want to track their performance like a pro. Today, we’re diving into the Facebook Conversion API—a tool that can seriously up your ad game by giving you better insights and tracking. Think of it like the secret sauce for ad-tracking success.
So, if you’re sitting there wondering, “Gerry, what’s the big deal with this Conversion API, and why should I care?”—great question! Let’s break it down in the simplest terms.
What is Facebook Conversion API?
Imagine you’re hosting a party and want to know who’s coming, what they’re bringing, and if they’re showing up. In digital advertising, the Facebook Conversion API is like your guest list manager, helping you track all those details and more for your ads.
Unlike the Facebook Pixel, which works through your website’s browser, the Conversion API operates directly from your server. It sends data straight to Facebook, giving you a more reliable way to track actions like purchases, sign-ups, or any other conversions you care about.
Why does this matter? Well, with browsers getting stricter about privacy (and cookies becoming a thing of the past), the Conversion API ensures you’re still getting accurate data without all the hiccups.
Why You Need to Set It Up
Okay, so we’ve established that the Conversion API is a big deal. But why should you bother setting it up? Here’s why:
- Better Data Accuracy: Because it’s server-to-server, you’re getting data that’s less likely to be blocked or missed by ad blockers.
- Improved Ad Tracking: More accurate data means better insights into how your ads are performing. You’ll know exactly what’s working and what isn’t.
- Enhanced Targeting: With more accurate data, you can refine your audience targeting, leading to better results from your ad campaigns.
Personal Story: I once ran a Facebook ad campaign and thought I was getting all the right data. Turns out, the Pixel was missing some key conversions due to ad blockers. Switching to the Conversion API was a game-changer—it felt like finally getting the full picture of my ad performance.
How to Set Up Facebook Conversion API
Ready to dive into the setup process? Don’t worry—it’s not as daunting as it sounds. Let’s break it down step-by-step. Grab your coffee, and let’s get into it.
1. Get a Facebook Business Account
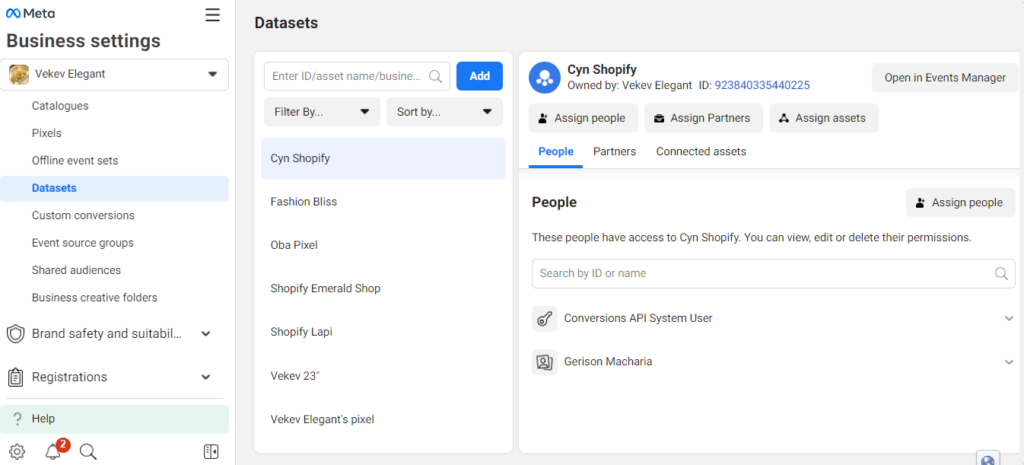
Before you can set up the Conversion API, you need a Facebook Business Account. If you don’t have one, you’ll need to create it first.
- Step 1: Go to Facebook Business and log in with your personal Facebook account.
- Step 2: Follow the prompts to create a Business Manager account.
2. Create a Facebook Pixel
You’ll need a Facebook Pixel for the Conversion API to work its magic.
- Step 1: In your Business Manager, go to the “Events Manager.”
- Step 2: Click on “Pixels” and then “Add.” Follow the instructions to set up your Pixel.
3. Set Up the Conversion API
Now, the fun part! Setting up the Conversion API involves connecting your server to Facebook.
- Step 1: Go to your Events Manager, and select the Pixel you created.
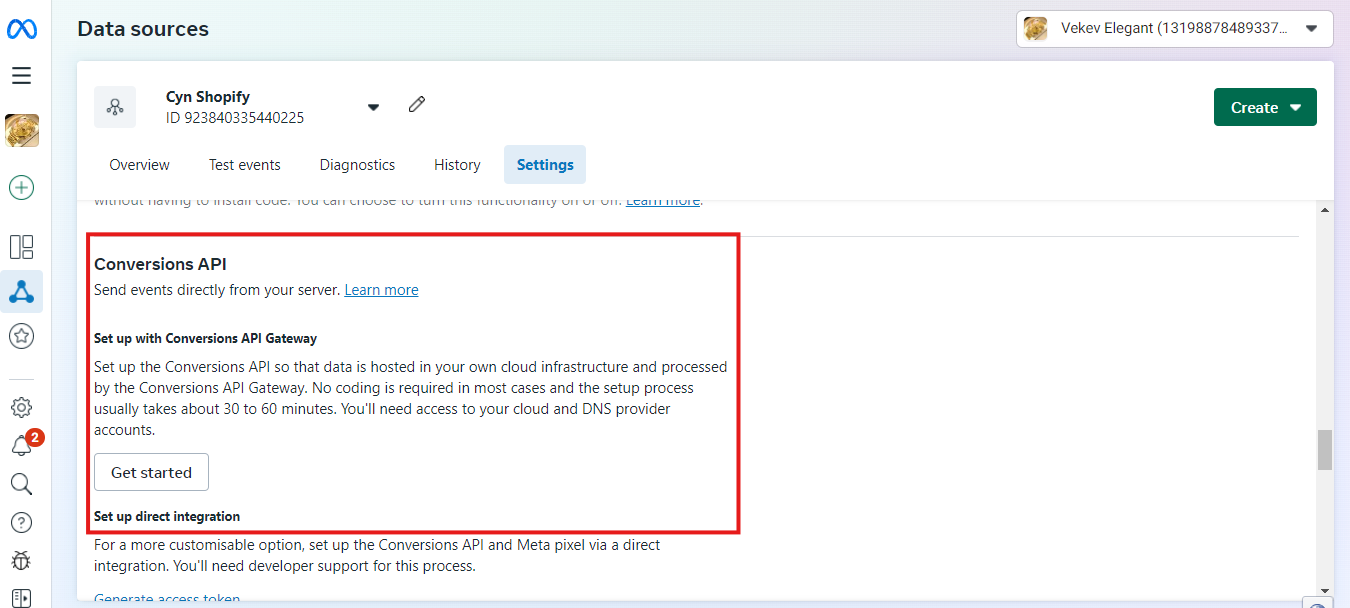
- Step 2: Click on “Settings” and scroll down to “Conversion API.”
- Step 3: Click “Set Up” and follow the instructions. You’ll need to provide some technical details here, which might involve your web developer if you’re not too tech-savvy.
Tip: Don’t be shy about asking for help. If you hit a snag, reach out to a developer or check out Facebook’s detailed guides—they’re surprisingly helpful.
4. Verify Your Setup
Once you’ve set everything up, it’s time to make sure it’s working correctly.
- Step 1: Use Facebook’s Test Events tool in the Events Manager to check if data is being sent correctly.
- Step 2: Make sure your data shows up accurately in your reports.
Pro Tip: Double-checking is key. You don’t want to set this up and then find out later that it’s not working as it should.
Common Pitfalls to Avoid
Setting up the Conversion API isn’t rocket science, but there are a few common mistakes you’ll want to avoid:
- Skipping Verification: Always verify that your data is coming through correctly. It’s like making sure your party guests got the invite—essential!
- Ignoring Data Privacy: Be aware of data privacy regulations and ensure your setup complies with them.
- Overlooking Integration: If you’re using other tools or platforms, make sure your Conversion API setup integrates smoothly with them.
Installation of Facebook API Via Partner Integration (Shopify)
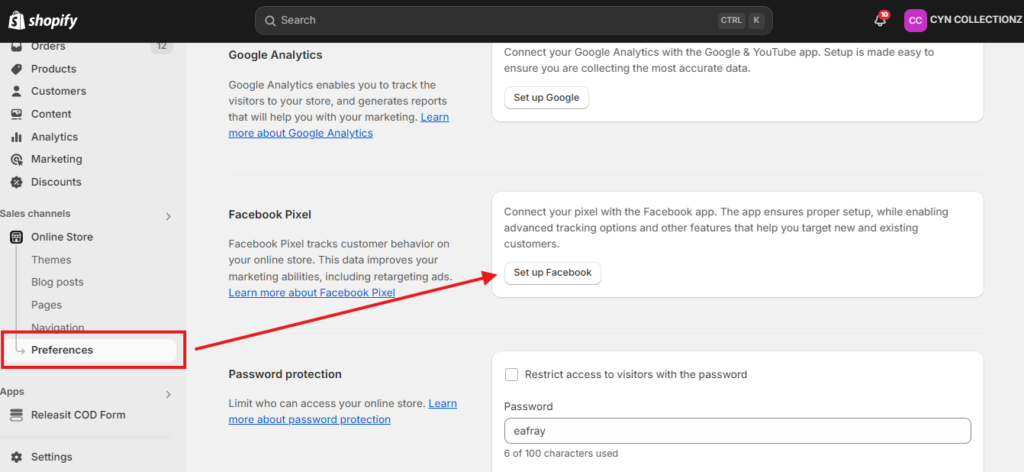
Setting up the Facebook Conversion API can sound a bit daunting, but there’s a nifty shortcut if you’re using Shopify. Instead of wrestling with code or settings, you can streamline the process with Shopify’s Partner Integration. Here’s how you can get it done with minimal fuss:
- Head to Your Shopify Admin Panel: Open up your Shopify admin dashboard and find your way to the App Store. It’s usually a quick click away from your main dashboard.
- Search and Install the Facebook and Instagram App: Type “Facebook and Instagram” into the search bar and look for the official app by Facebook. This app integrates your store with your social media accounts, making everything much smoother.
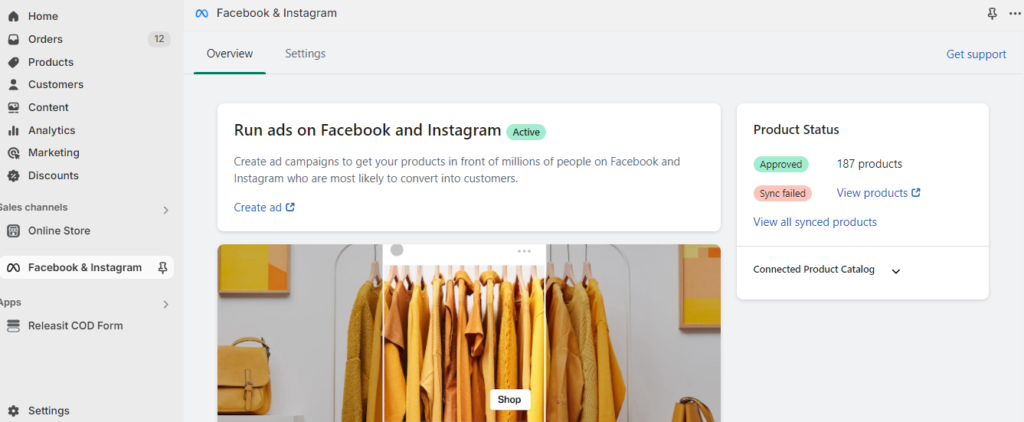
- Log In to Your Accounts: Once installed, you’ll need to log in to both your Facebook and Instagram accounts through the app. This step is crucial as it links your Shopify store to your social media profiles.
- Verify Integration: After logging in, check to ensure that the Conversion API is correctly set up. You should see options to manage your conversion tracking settings directly from the app interface.
Tips for a Smooth Setup:
- Update Everything: Make sure your Shopify store and the Facebook and Instagram apps are both up to date. This helps avoid compatibility issues and ensures you have the latest features.
- Check Permissions: Double-check that you’ve granted the necessary permissions for the app to access your Facebook and Instagram accounts. This step is vital for the app to function properly.
- Test Your Setup: After installation, use Facebook’s testing tools to verify that the Conversion API is tracking data accurately. It’s like doing a quick quality check before the big launch.
- Seek Help If Needed: If you hit any snags during the setup, don’t hesitate to reach out to Shopify support or consult the help guides provided by Facebook. Sometimes, a little extra guidance can save you a lot of time.
By following these steps, you’ll have the Facebook Conversion API up and running in no time. It’s a hassle-free way to ensure that your conversion tracking is spot on, allowing you to focus on what you do best—growing your business!
Setting Up Facebook Conversion API for WooCommerce: Partner Integration Made Simple
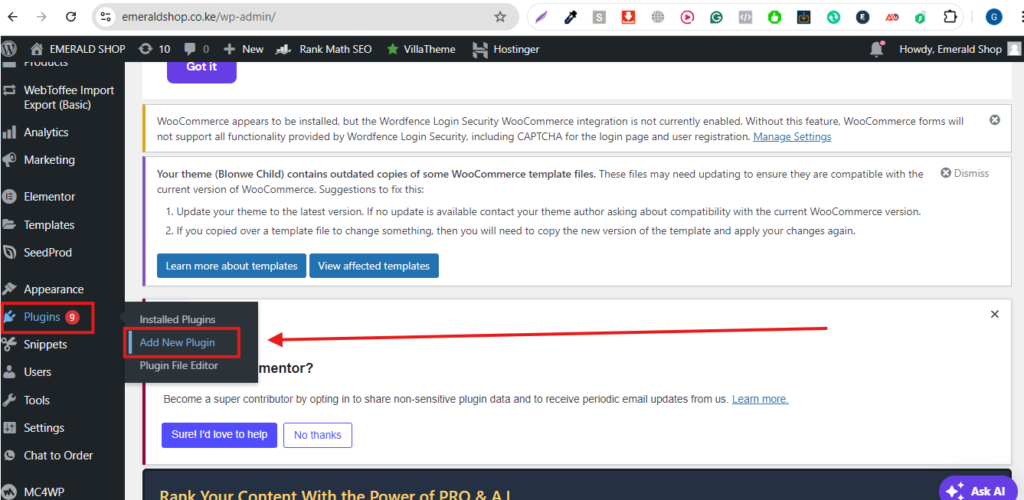
So, you’ve got your Shopify setup covered—great! But what if you’re using WooCommerce and want to dive into the Facebook Conversion API too? No worries! Setting it up is just as straightforward with partner integrations. Let’s break it down:
- Head to Your WordPress Admin Dashboard: Open up your WordPress admin panel. It’s where the magic happens—kind of like your control center for your entire site.
- Install the Facebook for WooCommerce Plugin: Go to the “Plugins” section and click on “Add New.” Search for the “Facebook for WooCommerce” plugin. Hit “Install Now” and then “Activate.” This plugin connects your WooCommerce store to Facebook, and it’s a game-changer for tracking.
- Configure the Plugin: Once activated, you’ll need to configure the plugin. Go to “WooCommerce” in your admin panel, find the “Settings” tab, and then click on the “Integration” section. Look for “Facebook” and click on it to enter your Facebook credentials and configure the settings.
- Log In and Sync: You’ll be prompted to log in to your Facebook account. This syncs your WooCommerce store with your Facebook Business Manager, ensuring that the Conversion API is correctly linked.
- Verify Conversion Tracking: After setup, use Facebook’s testing tools to check if the Conversion API is working correctly. This step is like giving your new setup a test drive to make sure everything runs smoothly.
Tips for a Smooth WooCommerce Setup:
- Update Regularly: Keep your WooCommerce and Facebook plugins up to date to ensure compatibility and access to the latest features.
- Check Plugin Settings: Make sure all settings are configured correctly in the plugin to avoid any hiccups with data tracking.
- Test Thoroughly: Use Facebook’s pixel helper tool to verify that your conversion events are firing correctly. It’s like a quick health check for your tracking setup.
- Seek Support If Needed: Don’t hesitate to reach out to WooCommerce or Facebook support if you encounter any issues. A little help can go a long way in getting everything sorted.
With these steps and tips, you’ll have the Facebook Conversion API up and running on your WooCommerce store in no time. It’s all about making sure your tracking is spot-on so you can focus on what you do best—growing your business and reaching your audience!
Wrapping It Up
There you have it! Setting up the Facebook Conversion API might seem like a lot, but once you’ve got it rolling, it’s a game-changer for tracking ad performance. You’ll get better accuracy, more reliable data, and ultimately, better results from your Facebook ads.
So, next time you’re sipping on your coffee and thinking about how to improve your ad tracking, remember—Facebook Conversion API is your friend. It’s like having an extra set of eyes on your ad performance, making sure you get the most bang for your buck.
Got any questions or tips of your own about setting up the Conversion API? Drop them in the comments —I’d love to hear from you!

